Add an Eject All External HDs Button in macOS
Saturday, July 3, 2021 @ 5:49 PM
Last edited: Wednesday, November 8, 2023 @ 4:54 AM
The Joy and Pain of a Docking Station
I love having a docking station to connect my power, second monitor, audio interface, HD camera, external hard drives, etc. all through one port to my MacBook Pro. It's super convenient and makes switching from "full-on workstation" to "lounging around the house" mode fast and (nearly) painless.
However, one big pain in the butt that used to plague me was that if I didn't eject the external hard drives before pulling the cable, I'd get a bunch of notifications telling me that I hadn't ejected those. I only have two physical external hard drives, but they're partitioned into multiple drives each so those notifications pile up pretty quick.
That pain is a thing of the past with this nifty little Touch Bar button that I built using Automator. Hopefully this "Eject All External HDs" button can help you out if you're in a similar place. Here's how to add it to your MacBook.
Create the Automator Quick Action
First, open the Automator app and select the Quick Action document type.
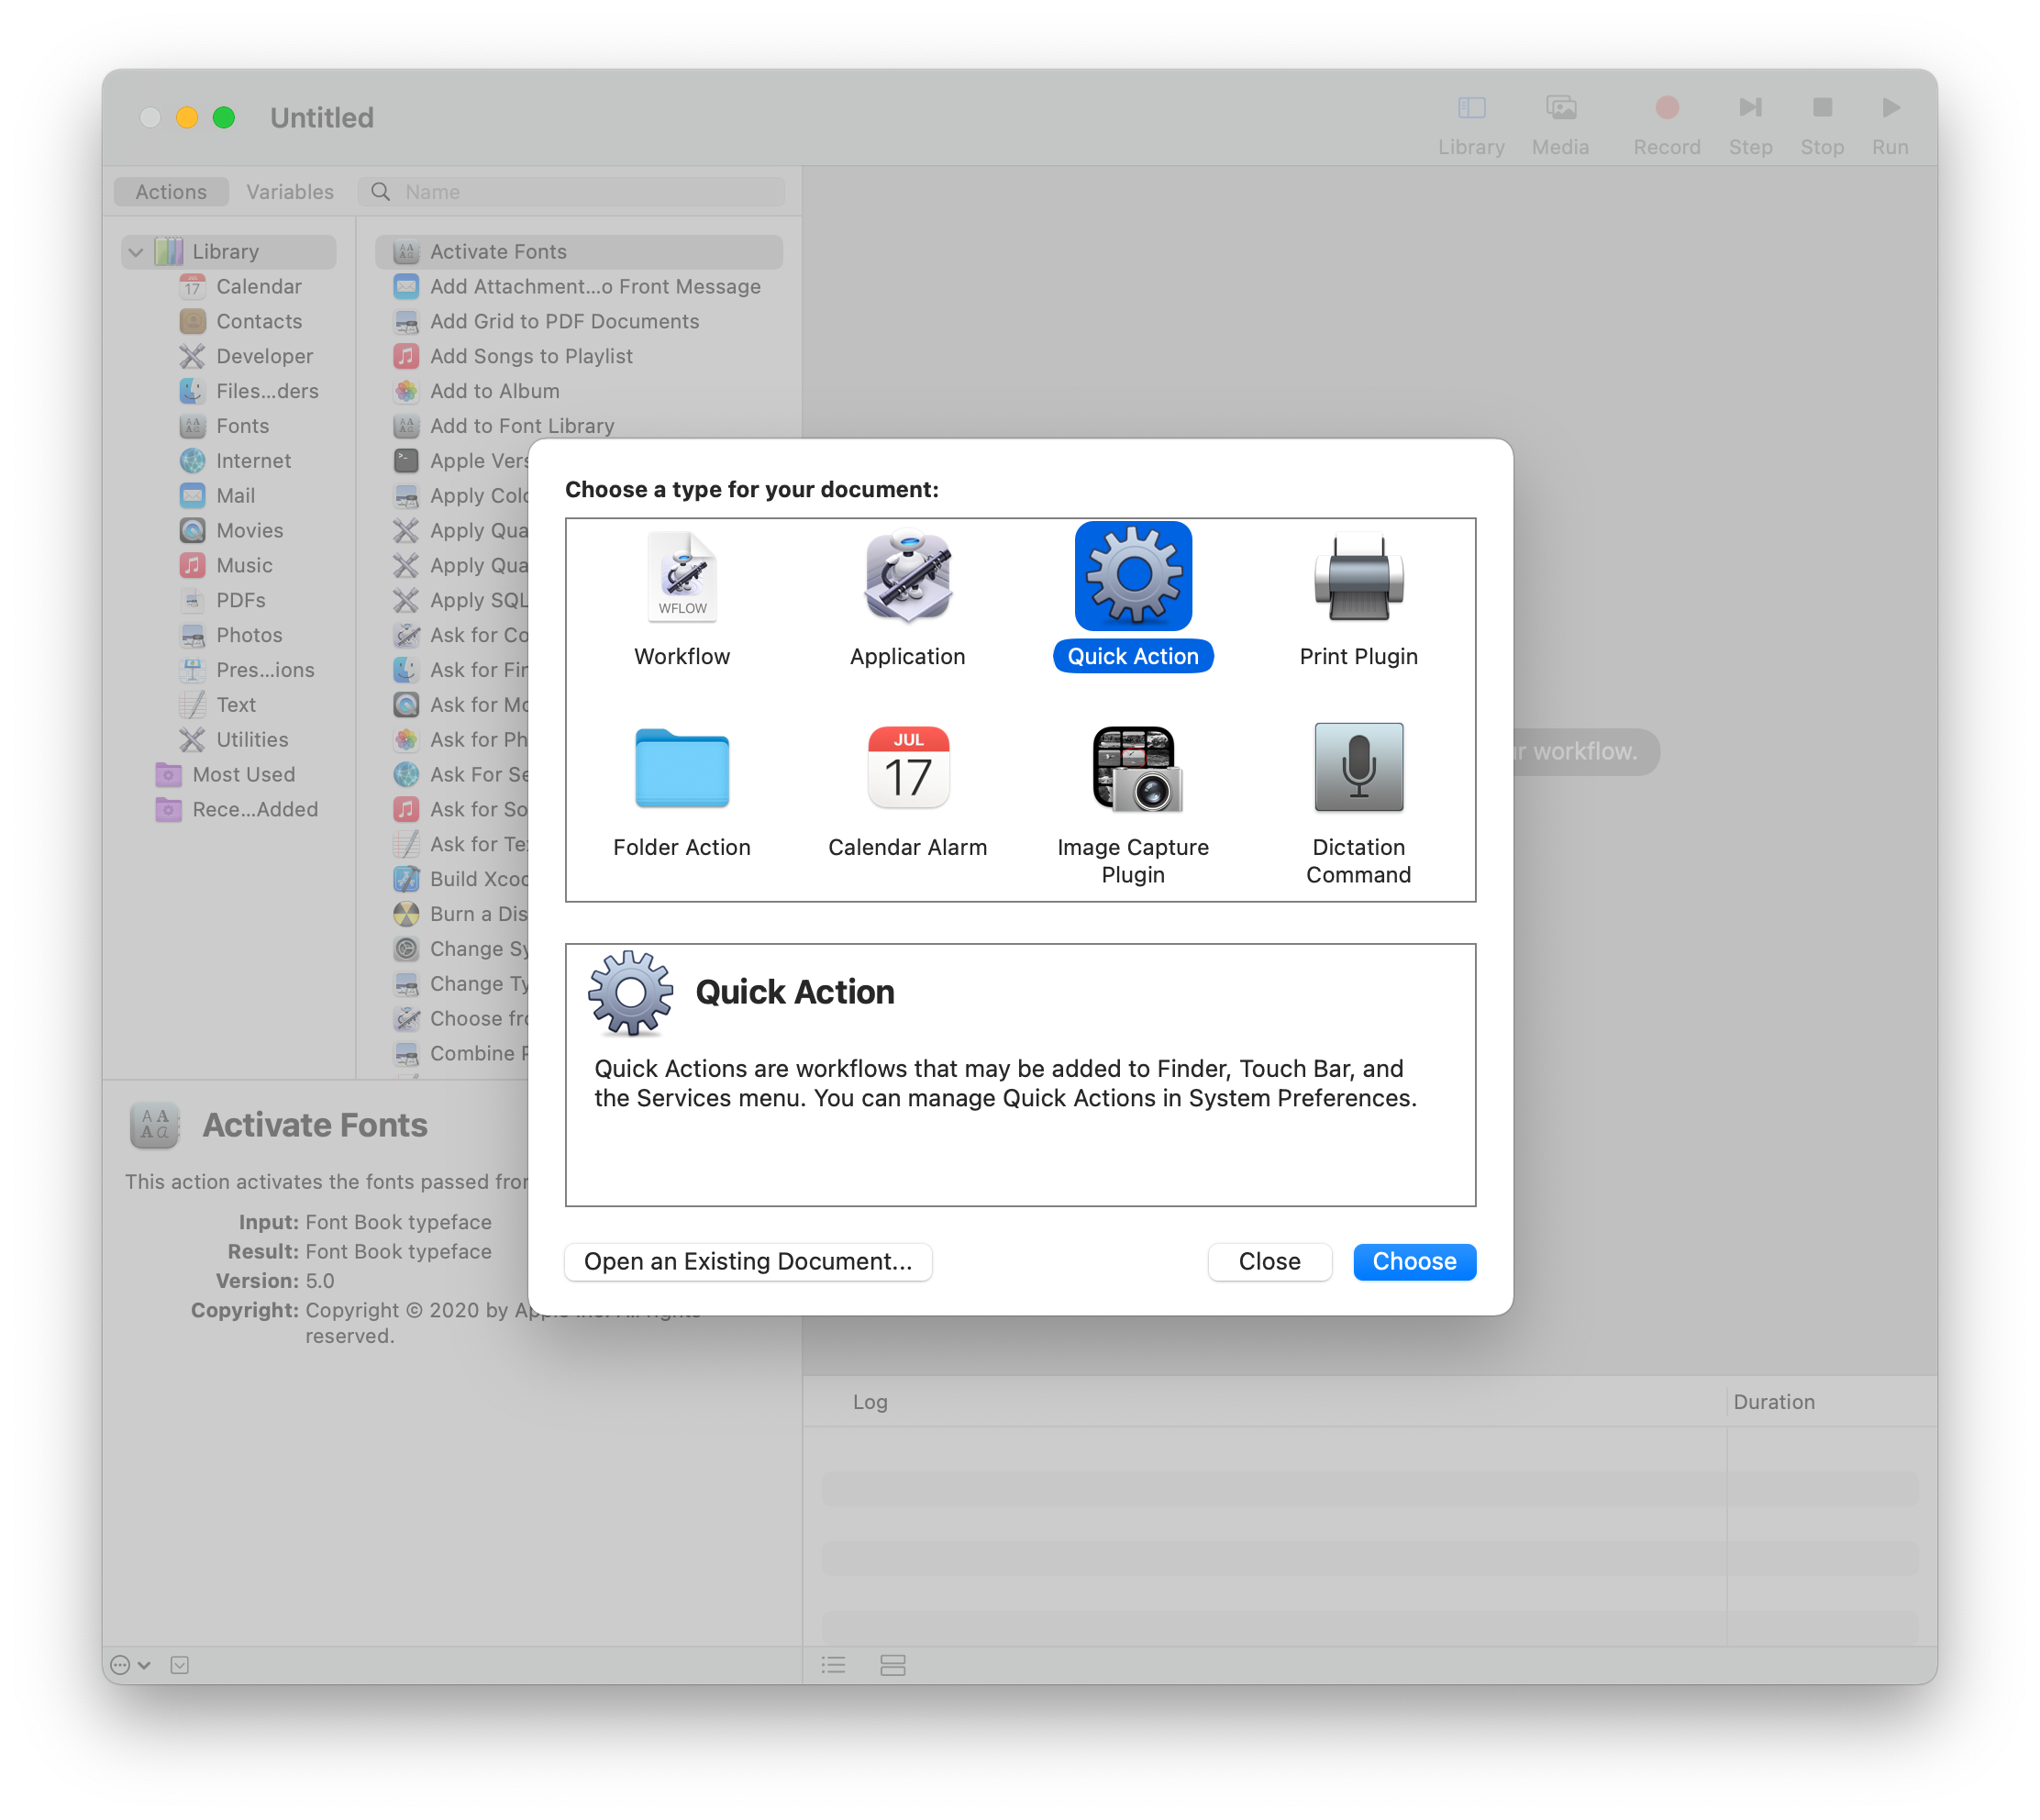
Set the Workflow receives option to no input and select an Image that you like.

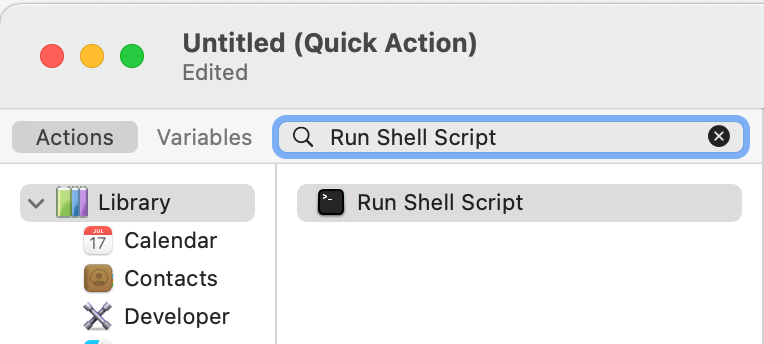
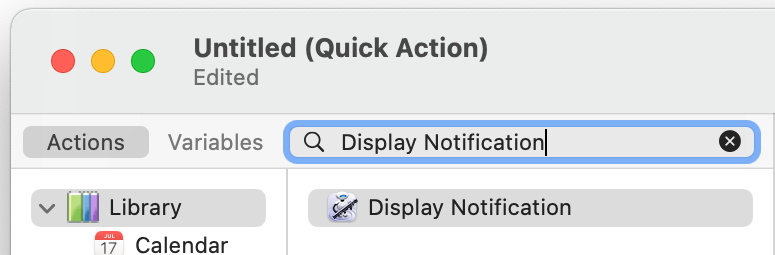
Use the search bar to look for the Run Shell Script action, and add it to your Quick Action.
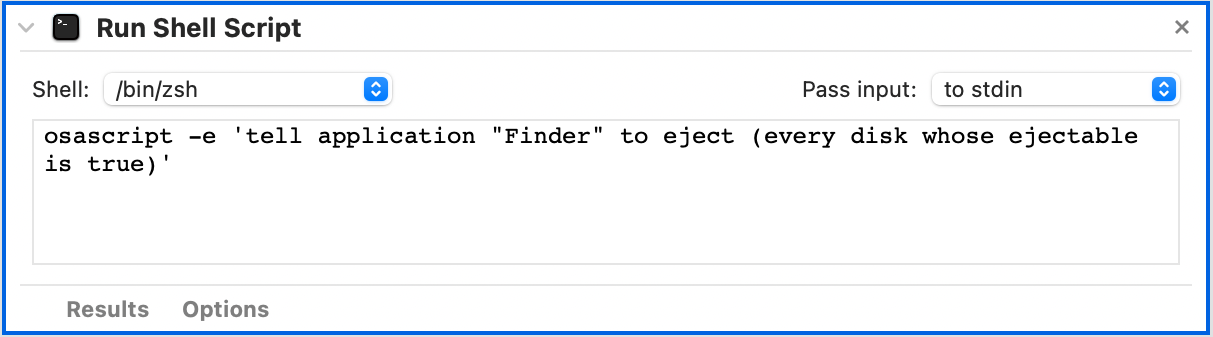
Add the following line as the script to run (thanks for the script go to the author of this StackOverflow answer):
osascript -e 'tell application "Finder" to eject (every disk whose ejectable is true)'
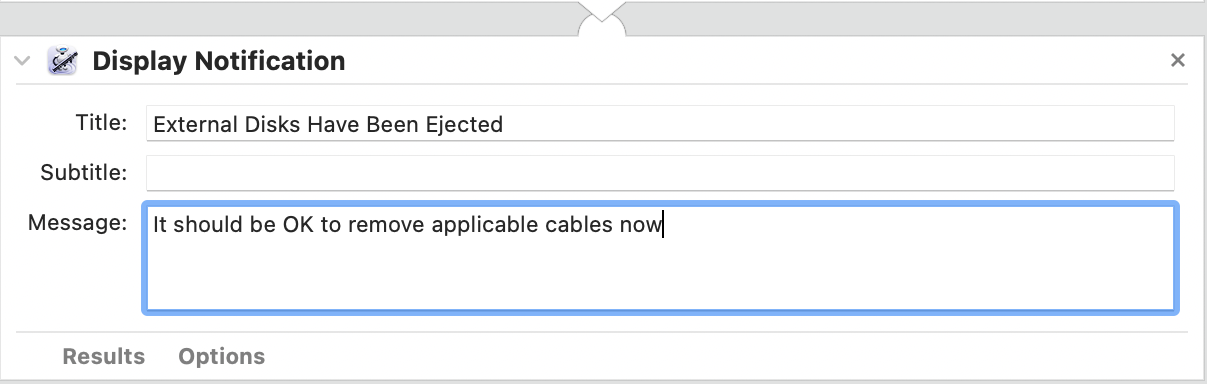
You could leave it at this, but then when you run the task you'd have to open Finder or Disk Utility to see when all the disks have been ejected. Let's fix that by adding a second action. Select the Display Notification action, and add it to your Quick Action.
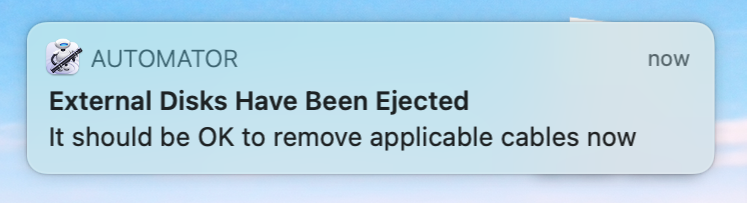
Set a title/subtitle/message that works for you. I have mine configured like this:
Save the Quick Action with a title that makes sense to you, I call mine Eject External Disks.
Make the Quick Action a Touch Bar Button
The most convenient way for me to fire off this task is using the Touch Bar, but you can also access it from the Services Menu if you like, or if your MacBook doesn't have a Touch Bar.
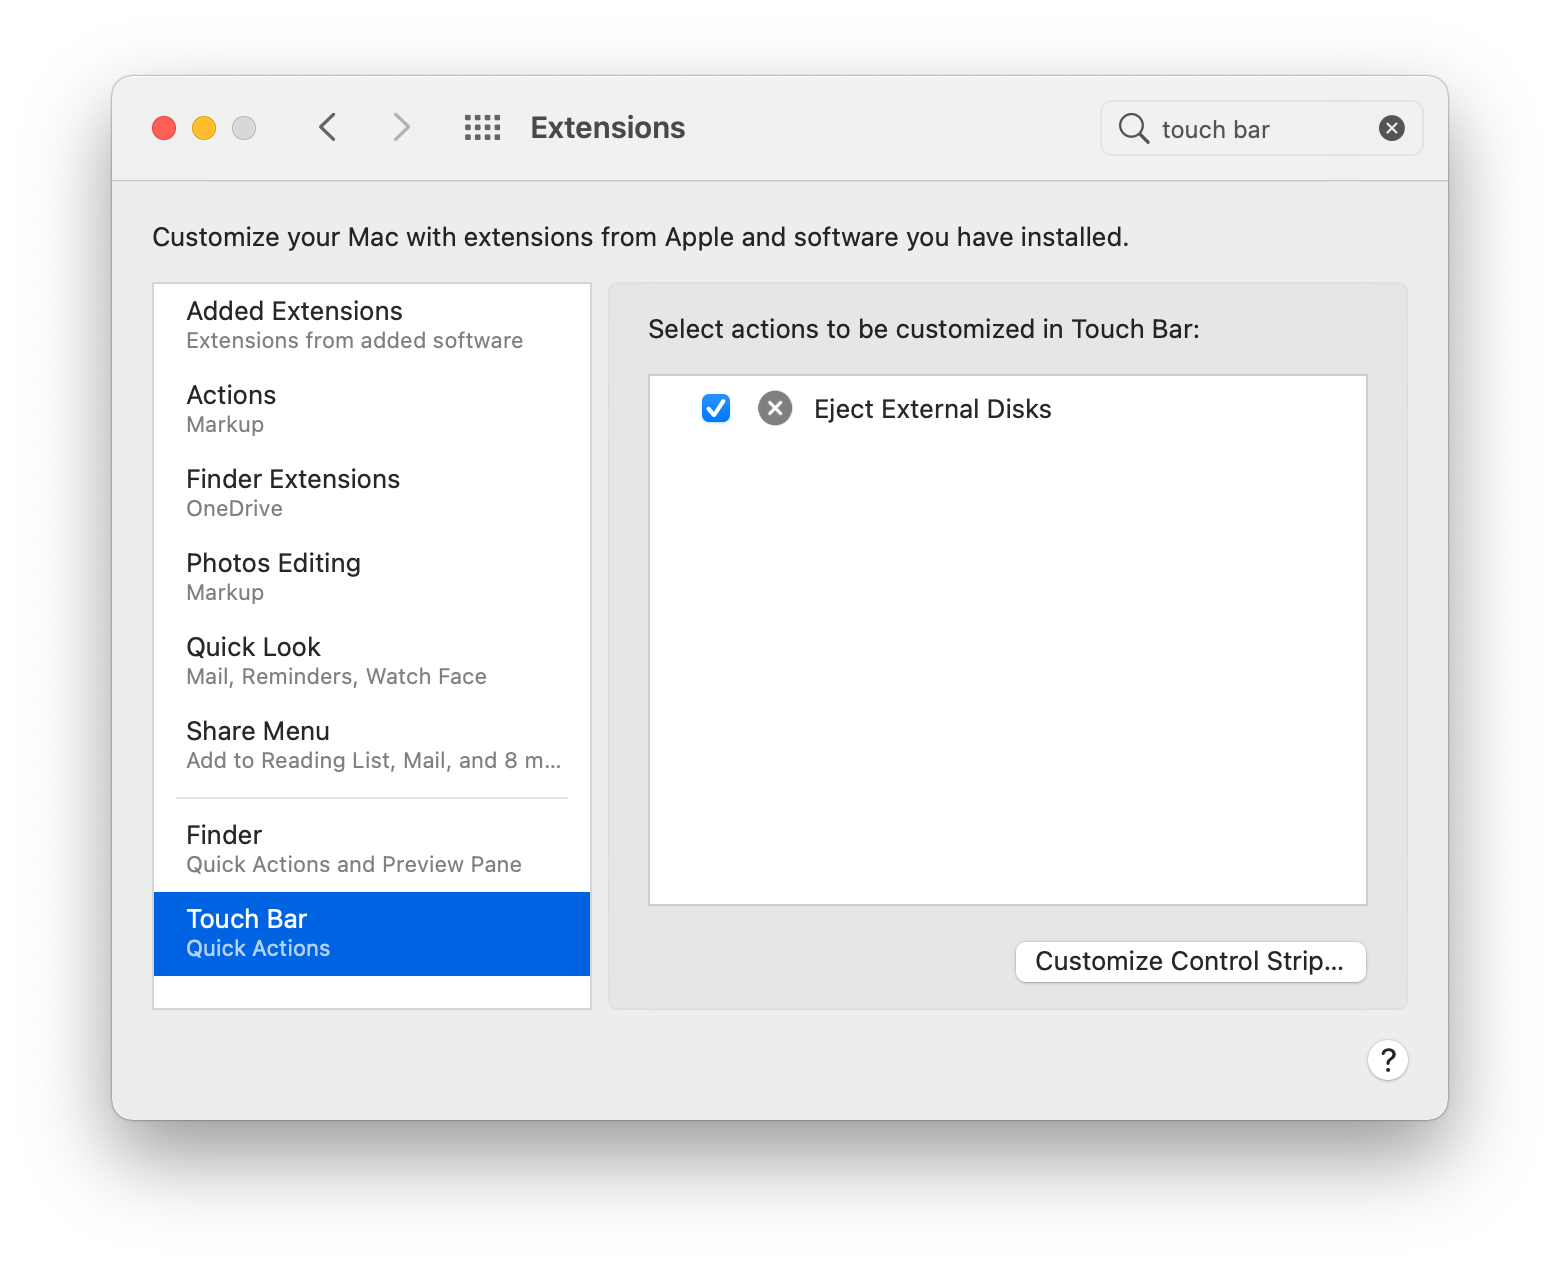
To add it to the Touch Bar, go to System Preferences -> Extensions -> Touch Bar and ensure it's selected.
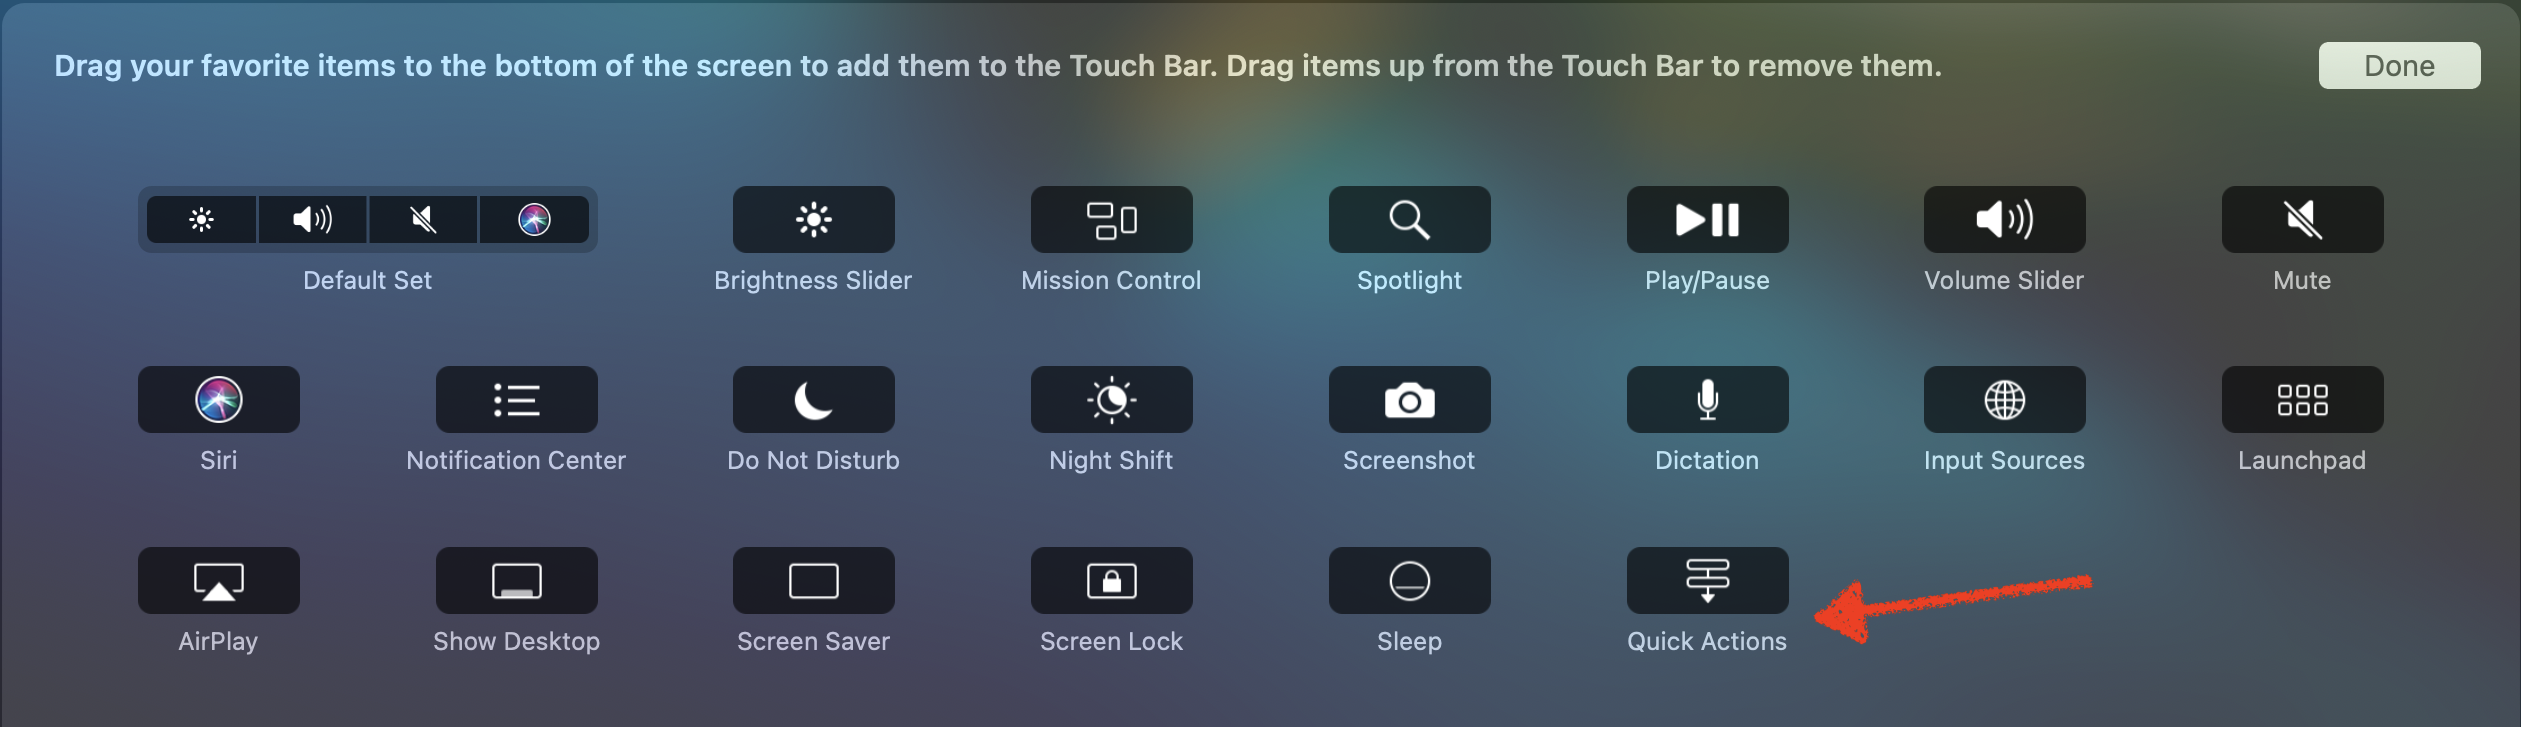
Next, click Customize Control Strip... and drag the Quick Actions button down onto your Touch Bar.
Enjoy the Lack of Pain When Pulling Away from Your Docking Station
Now, the next time you need to eject all the external hard drives from your MacBook before disconnecting your docking station, just tap the Quick Actions icon in your Touch Bar and hit the Eject External Disks button, then wait for the Automator notification to pop up.